Hey there, tech-savvy explorer! If you're diving into the world of IoT (Internet of Things) and Raspberry Pi, you're in for a treat. SSH remote IoT device Raspberry Pi free solutions are becoming a game-changer for hobbyists and professionals alike. Whether you're tinkering with home automation or building a full-fledged smart device network, mastering SSH can open up a world of possibilities. So, buckle up, because we're about to deep-dive into the awesome world of SSH and Raspberry Pi!
Let's face it, the tech landscape is evolving at lightning speed. IoT devices are no longer just a buzzword; they're a reality shaping our daily lives. And when it comes to managing these devices remotely, SSH (Secure Shell) is your best friend. With SSH, you can securely access and control your Raspberry Pi from anywhere in the world. But here's the kicker – you don't have to break the bank to do it. There are plenty of free tools and methods out there to help you get started.
This article is your ultimate guide to leveraging SSH for remote IoT device management using Raspberry Pi. We'll cover everything from the basics to advanced techniques, ensuring you're equipped with the knowledge to make the most out of your IoT projects. So, whether you're a beginner or a seasoned pro, stick around because this is gonna be a wild ride!
Read also:Ronnie Mcnutt Livestream The Ultimate Guide To Streaming Phenomena
Table of Contents
- What is SSH?
- Raspberry Pi Overview
- Why Use SSH for IoT Devices?
- Free SSH Options for Raspberry Pi
- Step-by-Step SSH Setup Guide
- Security Best Practices for SSH
- Troubleshooting Tips
- Advanced SSH Techniques
- Real-World Applications of SSH in IoT
- Conclusion
What is SSH?
Alright, let's start with the basics. SSH stands for Secure Shell, and it's a protocol designed for secure communication over unsecured networks. Think of it as a secure tunnel that allows you to access your Raspberry Pi from anywhere without compromising its security. SSH encrypts all data transmitted between your local machine and the remote device, making it nearly impossible for hackers to intercept sensitive information.
Here’s why SSH is a big deal:
- Encryption: All data sent via SSH is encrypted, ensuring confidentiality.
- Authentication: SSH uses public-key cryptography to verify the identity of both the client and the server.
- Flexibility: You can use SSH for a variety of tasks, from file transfers to remote command execution.
For IoT enthusiasts, SSH is like a Swiss Army knife. It gives you the ability to manage your devices remotely, troubleshoot issues, and even automate tasks. And the best part? It's free!
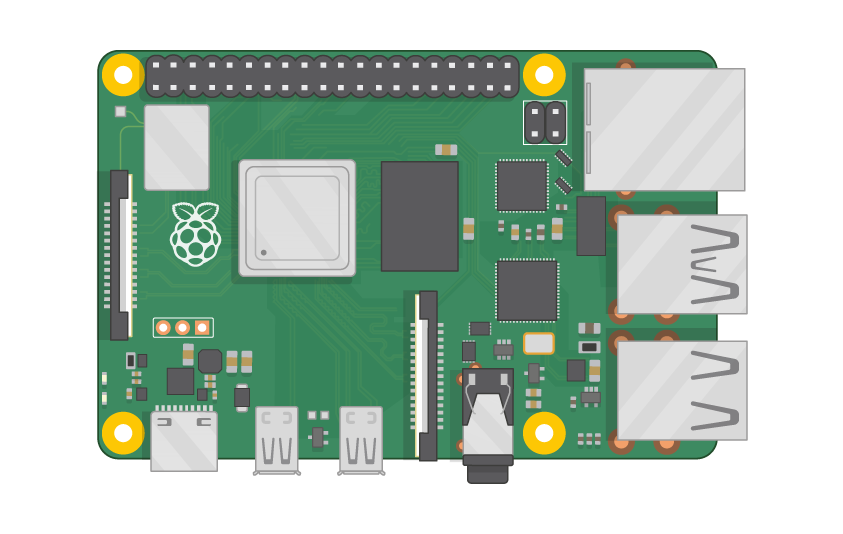
Raspberry Pi Overview
Now, let's talk about the star of the show – the Raspberry Pi. This little device has taken the tech world by storm. It's a credit-card-sized computer that can be used for a wide range of applications, from media centers to robotics. But what makes it truly special is its versatility and affordability.
Why Raspberry Pi?
- Cost-Effective: Raspberry Pi boards are incredibly affordable, making them accessible to hobbyists and professionals alike.
- Community Support: There's a massive community of Raspberry Pi enthusiasts who share knowledge, tutorials, and projects.
- Extensibility: With a variety of add-ons and accessories, you can customize your Raspberry Pi to fit any project.
When combined with SSH, Raspberry Pi becomes a powerhouse for IoT projects. You can deploy it in remote locations, manage it from anywhere, and integrate it with other devices seamlessly.
Read also:Iu Plagiarism Test Answers Ace Your Academic Integrity Quiz Today
Why Use SSH for IoT Devices?
Alright, so you've got your Raspberry Pi set up, but why bother with SSH? Well, here's the thing – IoT devices often operate in environments where physical access is limited. Whether it's a weather station on a mountain or a smart home system in a different city, remote access is crucial. And that's where SSH shines.
Key Benefits of SSH for IoT:
- Remote Access: SSH allows you to connect to your IoT device from anywhere in the world.
- Security: With encryption and authentication, SSH ensures your data remains safe.
- Automation: You can automate tasks like data collection, system updates, and more using SSH scripts.
And let's not forget the convenience factor. Imagine being able to troubleshoot and fix issues without having to physically touch the device. SSH makes that possible, saving you time and effort.
Free SSH Options for Raspberry Pi
Now, let's talk about the good stuff – free SSH options for Raspberry Pi. You don't need to invest in expensive software to get started. Here are some popular choices:
1. OpenSSH
OpenSSH is the most widely used SSH server and client. It's free, open-source, and compatible with Raspberry Pi. Most Raspberry Pi operating systems, like Raspbian, come pre-installed with OpenSSH. If it's not installed, you can easily add it using the package manager.
2. PuTTY
PuTTY is a popular SSH client for Windows users. It's lightweight, easy to use, and best of all, free. You can use PuTTY to connect to your Raspberry Pi from a Windows machine without any hassle.
3. Terminal (Mac/Linux)
If you're using a Mac or Linux machine, you already have an SSH client built-in. Simply open the terminal and type "ssh username@ip_address" to connect to your Raspberry Pi.
These tools are all you need to start exploring the world of SSH and Raspberry Pi. And the best part? They're all free!
Step-by-Step SSH Setup Guide
Ready to get your hands dirty? Let's walk through a step-by-step guide to setting up SSH on your Raspberry Pi.
Step 1: Enable SSH on Raspberry Pi
To enable SSH on your Raspberry Pi, you can use the Raspberry Pi Configuration tool. Simply open the terminal and type:
sudo raspi-config
Navigate to "Interfacing Options"> "SSH" and enable it. Alternatively, you can create an empty file named "ssh" in the boot partition of your SD card to enable SSH on first boot.
Step 2: Find Your Raspberry Pi's IP Address
To connect to your Raspberry Pi via SSH, you'll need its IP address. You can find it by typing "ifconfig" in the terminal or using a network scanning tool like Fing.
Step 3: Connect Using SSH
Once you have the IP address, you can connect to your Raspberry Pi using your preferred SSH client. For example, on a Mac or Linux machine, type:
ssh pi@ip_address
Replace "ip_address" with your Raspberry Pi's actual IP address. The default username is "pi" and the default password is "raspberry".
That's it! You're now connected to your Raspberry Pi via SSH.
Security Best Practices for SSH
Security is paramount when dealing with IoT devices. Here are some best practices to keep your Raspberry Pi and SSH setup secure:
- Change Default Credentials: Always change the default username and password to something strong and unique.
- Use Public-Key Authentication: Instead of relying on passwords, set up public-key authentication for added security.
- Disable Root Login: Restrict root access to prevent unauthorized users from gaining administrative privileges.
- Update Regularly: Keep your Raspberry Pi's operating system and SSH server up to date to protect against vulnerabilities.
By following these practices, you can ensure your IoT devices remain secure and protected from potential threats.
Troubleshooting Tips
Even the best-laid plans can go awry sometimes. Here are some common issues you might encounter with SSH and how to fix them:
- Connection Refused: Make sure SSH is enabled and your Raspberry Pi's IP address is correct.
- Permission Denied: Check your username and password. If you're using public-key authentication, ensure your keys are correctly configured.
- Timeout Errors: Ensure your network connection is stable and there are no firewall rules blocking SSH traffic.
With these tips in hand, you'll be able to troubleshoot and resolve most SSH-related issues in no time.
Advanced SSH Techniques
Once you've mastered the basics, it's time to level up your SSH skills. Here are some advanced techniques to take your Raspberry Pi projects to the next level:
1. SSH Tunnels
SSH tunnels allow you to securely forward traffic between your local machine and a remote server. This is particularly useful for accessing services that aren't exposed to the internet.
2. SSH Port Forwarding
Port forwarding allows you to map a local port to a remote port, enabling you to access services running on your Raspberry Pi from anywhere.
3. SSH Scripts
Automate repetitive tasks by writing SSH scripts. Whether it's backing up data or updating your system, scripts can save you time and effort.
These advanced techniques can help you unlock the full potential of SSH and Raspberry Pi.
Real-World Applications of SSH in IoT
Now that you know the ins and outs of SSH and Raspberry Pi, let's explore some real-world applications:
- Home Automation: Use SSH to manage and control smart home devices from anywhere.
- Environmental Monitoring: Deploy Raspberry Pi-based sensors in remote locations and monitor data via SSH.
- Remote Surveillance: Set up a Raspberry Pi-powered security camera system and access it remotely using SSH.
The possibilities are endless. With SSH and Raspberry Pi, you can bring your IoT ideas to life and make a real impact.
Conclusion
And there you have it – your ultimate guide to SSH remote IoT device Raspberry Pi free solutions. From setting up SSH to exploring advanced techniques, we've covered everything you need to know to get started. Remember, security is key, so always follow best practices to protect your devices.
Now it's your turn to take action. Try out the steps we've discussed, experiment with different configurations, and see where your imagination takes you. And don't forget to share your experiences and projects with the community. Who knows? You might just inspire someone else to dive into the world of IoT and Raspberry Pi!
So, what are you waiting for? Get out there and start tinkering!