Hey there, tech enthusiasts! If you're diving into the world of IoT and cloud networking, chances are you've stumbled upon the need to securely connect remote IoT devices using VPC on a Raspberry Pi. Whether you're a hobbyist or a seasoned pro, this guide is here to make your journey smoother. Today, we're going to break down everything you need to know about securely connecting remote IoT devices to a VPC using a Raspberry Pi, plus some free tools you can download. So, buckle up and let's get started!
Imagine this: you've got a bunch of IoT devices scattered all over the place, and you want to manage them seamlessly from a central location. That's where Virtual Private Clouds (VPC) come in handy. A VPC acts as a secure network environment for your devices, keeping everything organized and protected from prying eyes. And guess what? With a Raspberry Pi, you can set up a powerful and cost-effective solution without breaking the bank.
This article isn't just another tech jargon-filled post. We're here to simplify things for you, provide actionable insights, and ensure you leave with a clear understanding of how to securely connect remote IoT devices using VPC on a Raspberry Pi. Let's dive deep into the details so you can master this setup like a pro!
Read also:Hate Copypasta A Deep Dive Into The Viral Phenomenon Everyones Talking About
Table of Contents
- What is VPC and Why Does It Matter?
- Raspberry Pi Basics: The Little Device That Could
- How to Securely Connect Remote IoT Devices
- Tools You Need for This Setup
- Step-by-Step Guide to Setting Up VPC on Raspberry Pi
- Troubleshooting Tips for Common Issues
- Optimizing Performance of Your IoT VPC Setup
- Security Best Practices for IoT Devices
- Free Download Options for IoT Tools
- Wrapping It All Up
What is VPC and Why Does It Matter?
A Virtual Private Cloud (VPC) is essentially a private network within a cloud environment. Think of it as your own little fortress in the digital world, where you can control access, manage resources, and ensure security. When it comes to IoT, having a VPC is crucial because it allows you to isolate your devices from the public internet, reducing the risk of unauthorized access.
Here are some key benefits of using a VPC:
- Enhanced security: VPCs provide a secure environment for your IoT devices, protecting them from potential threats.
- Scalability: You can easily add or remove devices as needed without compromising the integrity of your network.
- Flexibility: VPCs offer a wide range of customization options, allowing you to tailor the setup to your specific needs.
Why Choose Raspberry Pi for IoT VPC?
Raspberry Pi is a small yet powerful device that's perfect for IoT projects. Its affordability, flexibility, and ease of use make it an ideal choice for setting up a VPC. Plus, the Pi's compatibility with various operating systems and software tools means you can customize your setup to fit your requirements.
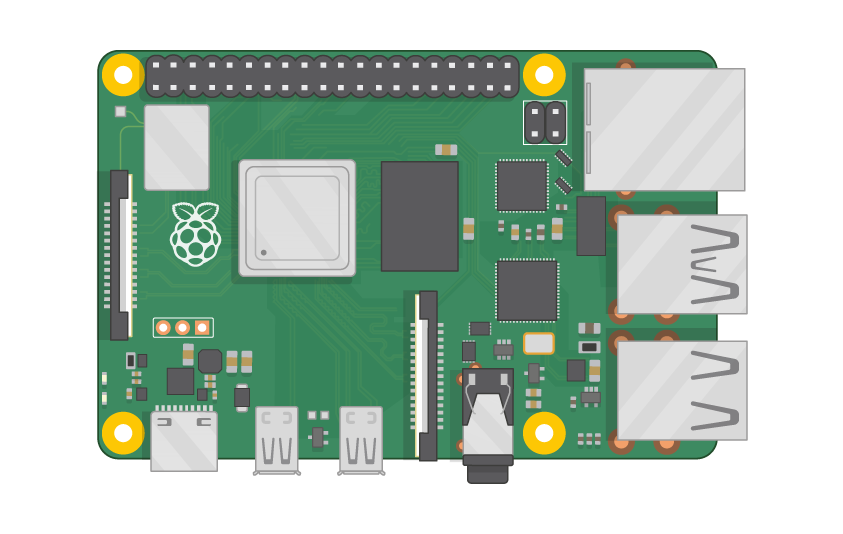
Raspberry Pi Basics: The Little Device That Could
Before we dive deeper into securely connecting remote IoT devices, let's take a moment to understand what makes the Raspberry Pi so special. This tiny computer has revolutionized the world of DIY tech projects, offering endless possibilities for innovation.
Here's a quick rundown of the Raspberry Pi's key features:
- Compact size: The Pi is small enough to fit in the palm of your hand, making it perfect for portable projects.
- Powerful performance: Despite its size, the Raspberry Pi packs a punch with its multi-core processors and ample RAM.
- Community support: The Pi has a vibrant community of developers and enthusiasts who contribute to its growth and development.
Choosing the Right Raspberry Pi Model
When it comes to setting up a VPC for IoT devices, you'll want to choose a Raspberry Pi model that can handle the workload. The Raspberry Pi 4 is a popular choice due to its improved processing power and connectivity options. However, depending on your specific needs, other models like the Pi 3 or Pi Zero might also work well.
Read also:Mew Mms Video The Phenomenon Unveiled
How to Securely Connect Remote IoT Devices
Now that we've covered the basics, let's talk about the main event: securely connecting remote IoT devices using VPC on a Raspberry Pi. This process involves several steps, including setting up the VPC, configuring the Pi, and ensuring proper security measures are in place.
Here's a high-level overview of what you'll need to do:
- Set up a VPC in your cloud provider's platform (e.g., AWS, Google Cloud).
- Configure the Raspberry Pi to act as a gateway for your IoT devices.
- Implement security protocols to protect your devices and data.
Securing Your IoT Devices
Security should always be a top priority when working with IoT devices. Here are some tips to help you keep your setup safe:
- Use strong passwords and authentication methods.
- Regularly update your software and firmware to patch vulnerabilities.
- Monitor your network for suspicious activity and take action if necessary.
Tools You Need for This Setup
Before you start setting up your VPC on a Raspberry Pi, you'll need to gather a few tools and resources. Here's a list of essentials:
- Raspberry Pi (preferably the latest model).
- MicroSD card with a compatible operating system (e.g., Raspberry Pi OS).
- Power supply and necessary cables.
- Cloud provider account (AWS, Google Cloud, etc.).
Free Tools for IoT Development
There are plenty of free tools available that can help you with your IoT VPC setup. Some popular options include:
- Mosquitto: A lightweight MQTT broker for messaging between IoT devices.
- Node-RED: A visual programming tool for wiring together IoT devices and services.
- Wireshark: A network protocol analyzer for troubleshooting and monitoring.
Step-by-Step Guide to Setting Up VPC on Raspberry Pi
Now that you have all the tools you need, let's walk through the process of setting up a VPC on your Raspberry Pi. Follow these steps carefully to ensure a successful setup:
Step 1: Create a VPC in Your Cloud Provider
Log in to your cloud provider's platform and create a new VPC. Configure the settings according to your requirements, including IP ranges, subnets, and security groups.
Step 2: Configure the Raspberry Pi
Install the necessary software on your Raspberry Pi and configure it to act as a gateway for your IoT devices. This may involve setting up networking, firewall rules, and other security measures.
Step 3: Connect Your IoT Devices
Once your VPC and Raspberry Pi are set up, it's time to connect your IoT devices. Make sure each device is properly configured to communicate with the VPC and Raspberry Pi.
Troubleshooting Tips for Common Issues
Even the best-laid plans can sometimes go awry. If you encounter any issues during your setup, here are some troubleshooting tips to help you get back on track:
- Check your network settings to ensure everything is configured correctly.
- Verify that all devices are properly connected and powered on.
- Review your security settings to make sure nothing is blocking communication.
Optimizing Performance of Your IoT VPC Setup
To get the most out of your IoT VPC setup, consider these performance optimization tips:
- Use efficient communication protocols like MQTT for low-latency data transfer.
- Implement load balancing to distribute traffic evenly across your devices.
- Regularly monitor your network performance and make adjustments as needed.
Security Best Practices for IoT Devices
As we mentioned earlier, security is critical when working with IoT devices. Here are some additional best practices to keep in mind:
- Encrypt all data transmissions to protect sensitive information.
- Limit access to your VPC and devices to only authorized users.
- Regularly audit your security measures to ensure they remain effective.
Free Download Options for IoT Tools
Here are some free tools you can download to enhance your IoT VPC setup:
- Mosquitto: A lightweight MQTT broker for messaging between IoT devices.
- Node-RED: A visual programming tool for wiring together IoT devices and services.
- Wireshark: A network protocol analyzer for troubleshooting and monitoring.
Wrapping It All Up
And there you have it, folks! A comprehensive guide to securely connecting remote IoT devices using VPC on a Raspberry Pi. By following the steps outlined in this article, you'll be well on your way to creating a robust and secure IoT setup that meets your needs.
Remember, the key to success is preparation and attention to detail. Take the time to understand your requirements, choose the right tools, and implement best practices for security and performance. And don't forget to keep learning and experimenting – the world of IoT is full of exciting possibilities!
So, what are you waiting for? Grab your Raspberry Pi, download the necessary tools, and start building your secure IoT VPC today. And if you found this article helpful, be sure to leave a comment, share it with your friends, or check out some of our other tech guides. Happy tinkering!