Picture this: you're chilling at home, and suddenly you need to access your IoT device miles away. What do you do? Panic? Nope! You whip out your Android phone, fire up an SSH app, and boom—you're in control. SSH (Secure Shell) is the superhero of remote connections, allowing you to securely access and manage devices from afar. Whether you're a tech enthusiast or a professional, mastering SSH IoT device remotely on Android is a skill that'll save your bacon time and time again.
In today's fast-paced world, IoT devices are everywhere—from smart thermostats to industrial sensors. Being able to manage them remotely is not just convenient; it's essential. With SSH, you can execute commands, transfer files, and troubleshoot issues without needing physical access. And guess what? You don't need a fancy laptop to do it. Your trusty Android phone has got your back.
Now, I know what you're thinking: "Isn't SSH complicated?" Sure, it can be if you dive into the nitty-gritty details, but with this guide, we'll break it down step by step. By the end, you'll be confidently SSHing into your IoT devices like a pro. So, grab a coffee, get comfy, and let's dive in!
Read also:Keith Conan Richter Released The Untold Story You Wont Believe
Why SSH IoT Device Remotely on Android Matters
Let's talk about why SSH is such a big deal when it comes to IoT devices. First off, security is a huge concern. IoT devices are often vulnerable to attacks, and using SSH ensures that your connection is encrypted and secure. Plus, who wants to lug around a laptop when all you need is your phone?
SSH gives you the power to manage your IoT devices from anywhere in the world. Imagine being able to restart a server, update firmware, or check logs without needing to be physically present. It's like having a remote control for your digital life. And with more and more devices becoming smart, this skill is only going to become more valuable.
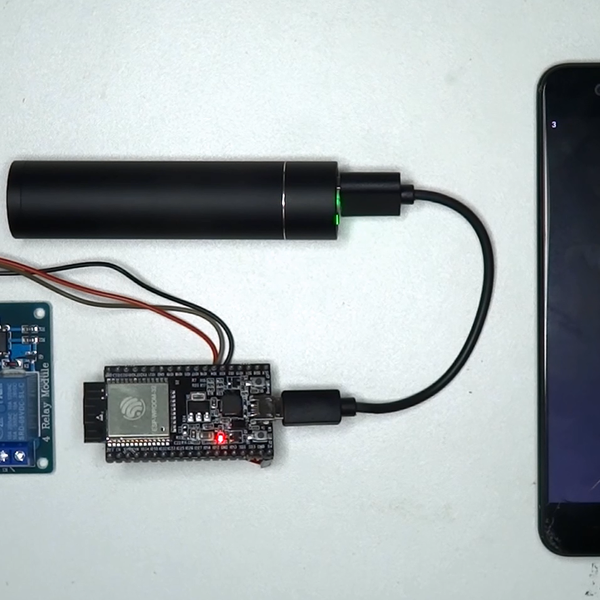
Another cool thing about SSH is its versatility. Whether you're managing a Raspberry Pi, a smart home hub, or an industrial sensor, SSH can handle it all. And with Android's growing capabilities, it's easier than ever to access these devices on the go.
Setting Up SSH on Your Android Device
Alright, let's get practical. The first step in mastering SSH IoT device remotely on Android is setting up your phone. There are a ton of SSH apps out there, but some stand out from the crowd. Apps like JuiceSSH and Termux are popular choices for good reason. They're reliable, feature-packed, and easy to use.
Once you've downloaded your app of choice, the next step is configuring it. This usually involves setting up a connection profile where you input your IoT device's IP address, port number, and login credentials. Don't worry if this sounds confusing—we'll break it down in the next section.
Pro tip: Make sure your Android device is on the same network as your IoT device when setting up the initial connection. This makes things a lot smoother and helps you avoid headaches later on.
Read also:Julie Green Rumble The Queen Of Heartfelt Melodies
Choosing the Right SSH App
Not all SSH apps are created equal. Some are great for beginners, while others are more suited for advanced users. Here's a quick rundown of the top contenders:
- JuiceSSH: User-friendly interface, perfect for beginners.
- Termux: Command-line powerhouse for advanced users.
- Serverauditor: Offers advanced features like file transfer and session recording.
Each app has its strengths, so choose one that fits your needs. If you're just starting out, JuiceSSH is a great place to begin. Once you're more comfortable, you can explore the other options.
Configuring Your IoT Device for SSH Access
Now that your Android device is ready, it's time to prep your IoT device. The exact steps will vary depending on the device, but the general process is pretty straightforward. First, you'll need to enable SSH on your IoT device. This usually involves accessing the device's settings via a web interface or command line.
Next, make sure your device has a static IP address. This ensures that your device's address doesn't change, making it easier to connect to consistently. If you're using a router, you can usually set this up in the router's settings.
Finally, open the necessary ports on your router to allow SSH traffic. This is where things can get a little tricky, so if you're not comfortable doing this yourself, it might be worth consulting a tech-savvy friend or professional.
Securing Your SSH Connection
Security should always be a top priority when setting up SSH. Here are a few tips to keep your connection safe:
- Use strong, unique passwords.
- Enable two-factor authentication if possible.
- Limit access to specific IP addresses.
By following these best practices, you can minimize the risk of unauthorized access and keep your IoT devices secure.
Executing Commands via SSH on Android
Now for the fun part: actually using SSH to manage your IoT device. Once you're connected, you can execute commands just like you would on a desktop computer. Need to check system logs? No problem. Want to update software? Easy peasy.
Here are a few common commands to get you started:
ls: List files and directories.cd: Change directory.sudo: Run commands with superuser privileges.
Remember, SSH is a powerful tool, so use it responsibly. Always double-check your commands before hitting enter to avoid accidental changes or deletions.
Troubleshooting Common SSH Issues
Even the best-laid plans can go awry sometimes. If you're having trouble connecting to your IoT device via SSH, here are a few things to check:
- Make sure your Android device and IoT device are on the same network.
- Verify that SSH is enabled on your IoT device.
- Double-check your IP address and port number.
If none of these solutions work, it might be time to consult the device's manual or reach out to the manufacturer's support team.
Transferring Files via SSH on Android
Another awesome feature of SSH is the ability to transfer files between your Android device and your IoT device. This is particularly useful if you need to upload scripts, configuration files, or other data. Most SSH apps on Android support file transfer, so you don't need any additional software.
To transfer files, you'll typically use a protocol called SFTP (Secure File Transfer Protocol), which is built into SSH. Simply navigate to the file you want to transfer in your SSH app, select it, and choose the destination directory on your IoT device.
Pro tip: If you're transferring large files, make sure your connection is stable to avoid interruptions.
Using SSH Tunnels for Secure Connections
SSH tunnels are a nifty feature that allow you to securely access services on your IoT device that aren't normally accessible over the internet. For example, you could use an SSH tunnel to access a web interface or database running on your device.
Setting up an SSH tunnel involves specifying a local port on your Android device and forwarding it to a port on your IoT device. This can be a bit technical, but most SSH apps have built-in support for tunnels, making the process much easier.
Best Practices for SSH IoT Device Remotely on Android
To get the most out of SSH, it's important to follow best practices. Here are a few tips to keep in mind:
- Regularly update your SSH app and IoT device firmware.
- Keep your passwords secure and avoid using the same password across multiple devices.
- Document your connection settings and commands for easy reference.
By following these guidelines, you'll ensure a smooth and secure experience when managing your IoT devices remotely.
Staying Up-to-Date with SSH Trends
The world of SSH is constantly evolving, so it's important to stay informed. Follow tech blogs, join online communities, and attend webinars to keep up with the latest developments. Who knows? You might discover new features or techniques that make your life even easier.
Conclusion: Take Control of Your IoT Devices with SSH
And there you have it—a comprehensive guide to mastering SSH IoT device remotely on Android. Whether you're a beginner or an experienced user, SSH is a powerful tool that can help you manage your IoT devices with ease. By following the steps outlined in this guide, you'll be well on your way to becoming an SSH pro.
So, what are you waiting for? Grab your Android phone, fire up your favorite SSH app, and start exploring the possibilities. And don't forget to share your experiences and tips in the comments below. Happy SSH-ing!
Table of Contents
- Why SSH IoT Device Remotely on Android Matters
- Setting Up SSH on Your Android Device
- Configuring Your IoT Device for SSH Access
- Executing Commands via SSH on Android
- Transferring Files via SSH on Android
- Best Practices for SSH IoT Device Remotely on Android
- Conclusion: Take Control of Your IoT Devices with SSH